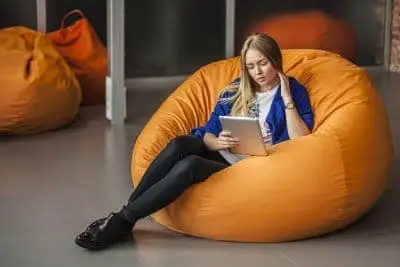
Home is where one can stay comfortable without the worry of being presentable. One can relax all that they want to without any concerns. It is a place where one can do all they want to and spend their time to relax before heading into the same daily schedules.
But one problem is that for a perfect home, one has to pay attention to all the minute details. Not only one has to spend a lot of time managing and keeping the house in order, but also it sometimes requires extra attention so that the house may look good. One of the great pieces of decoration which can also come handy is a bean bag..
How can a bean bag be used?
A bean bag is something super comfortable when it comes to seating. It not only acts as a decorative piece, but it can come quite handy too. It is usually filled with polystyrene beads, foam, or dry natural beans.
These are completely comfortable and can also fit in anywhere you want to. These are designed to follow your body posture, so no matter how you want to lay in, they will support you. If you want to know how to create a bean bag chair without sewing, then you can use the double knot technique in place of sewing.
There are many benefits of owning a bean bag. One of the major ones includes that if you have children, there is no need to worry about them getting hurt as these are quite soft. Because of their small size, they can fit in anywhere.
It is also perfect for a time when you want to relax as these support your posture so you can lay in any way you want to. These are also quite affordable, and you can even make one on your own. These are much better than the traditional sofas which need a lot of maintenance.
Sewing Patterns for Bean Bags
A beanbag is something quite easy to make, and you can save up a lot of money if you choose to make one yourself. Just keep reading to know the sewing patterns for bean bags.
- For making a bean bag chair properly, you will have to make three different patterns for the chair, which include the top, bottom, and sides. Do make sure to buy the material required according to the size you are making it for.
- The material required for making it includes muslin for lining and yardage for the outer cover, zipper depending on the size you are making, and polystyrene pellets for fillers.
- For making a pattern for the sides, it is essential to make a grid. The grid can be made by any method you find the most suitable. It must have cubes that are around 2.5 cm apart from each other. For the best results, you can use a cutting board or tracing paper. The grid will help you out in the process later on.
- For the pattern for the top, fold paper into half and draw an arch. Cut the arch out and unfold the paper. Use scale and pencil for the process so that you can get the best results.
- Cut the circle into half from the center, which will result in the bottom pattern for the chair. These patterns will help you out in making the chair properly.
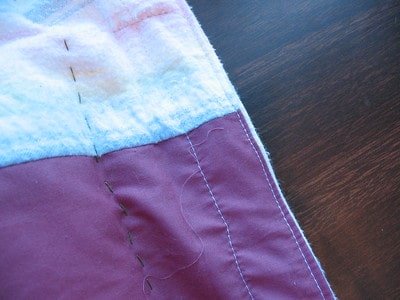
- Once you are done with creating these patterns, the next step is to stitch the zips. These zips are to be attached at the bottom of the chair. Make sure to keep the zipper teeth on the seam line. This will be the answer to how to make bean bag chair cover. The next thing to be done is to stitch all the sides together. This will result in making the basic shape of your bean bag. To make the top stitch easier, make sure to leave the last seam open.
- Make the top stitch now and keep the clip seam allowances at a distance of minimum 1.3 cm, which will come handy.
- Now mark and divide the top into six edges using which you can make the stitching a little easier. You have to repeat the step for the bottom of the bag.
- On the top side, make sure to keep the zipper partially open. Now, you have to repeat all the steps for the inner lining of the bag. It is important to keep the bag safe and long-lasting.
- Once you have successfully created the inner lining, fill the bag with the filling of your choice. It is recommended to keep polystyrene pellets. The amount required will vary depending on the size of the bag you have just created. Now close the zippers, and your bag is ready.
- You can use it for anything that you need and in case of any problem, see the steps again and make changes accordingly. You can also invite your friends or family members over to help you out in it. It will also act as a refreshment and quite fun.
- You can also use different colored fabric for the bean bag, and it can turn out to be a multi-colored bean bag. You can also make these for sale or just for the craft.
Benefits of having one
Well, now you know how to make a bean bag on your own, so why to waste time in the market when you can make one yourself? These are quite easy to wash. You can get the outer layer and wash it.
The bag is protected with the inner layer, and you don’t have to worry at all about the bag as it can last for a long time. It takes up much lesser space than the usual sofas. While making your one, make sure that you get all the measurements right so that you can make it the exact size you are looking for.
You can use the chair for any purpose, and it will come handy for sure. It can result in a great craft activity for your kids, and they’ll also have a lot of fun in learning. So get the material ready and start making your bean bag.