In this century, people are looking for more luxuries and comfortable things rather than general accessories. Most of the time, people believe bean bags may give a more relaxed and fun feeling than anything else.
But over time, bean bags will go flat and lose their fluffy feel due to some reasons. Then users want to refill the bean bag with new beans. Rather than that, most people need to remove the bean beads because of the following reasons.
- Want to clean/dry bean bag
- Eliminate mold development in the bean bag
- Recover shrinkage of bean bags
- To dispose of bean bag filler beads
- When bean bag loses its comfortable feel
However, one of the crucial questions that bean bag owners have is how to remove the beans? Do you have any idea about how to remove beanballs, especially when they have static charge?
So, I will share my experience regarding removing bean balls or empty bean balls from bean bags by using the safest and easiest method.
Keep reading to choose the best method from them!
Table of Contents
Methods to Remove Beans From a Bean Bag
Method 1 – Connect Mouth of the Bean Bag to a Garbage Bag
Generally, bean bags are filled with expanded polystyrene balls (EPS). Also, they got flattened over time. Thus, when it loses its fluffy properties, you should remove them from the bean bag cover.
As you already know, EPS balls have a static charge. Because of that, you have to remove them carefully. Otherwise, spill-out beanballs may stick with your electric equipment, and it will create a mess.
Therefore below method is ideal for EPS. But not only that, you can practice this on foam, strigiform, cloth, polythene, and eco-friendly fillers like hay.
The best thing is, you do not need any specific tools to do this method. Also, you can complete this task within 5 minutes by yourself.
Required materials:
- Safety pins 10, 15
- Garbage bag or big pillowcase
Step 1: Remove Bean Bag Cover
Most bean bags come with a lining layer. Thus, at the very first step, you have to remove the outer cover.
Step 2: Open the Bean Bag’s Lining and Join With the Garbage Bag
In this step, you should open few inches of the bean bag inner cover zipper. Then use a safety pin to join the garbage bag and bean bag opening. Attach safety pins as much as closer.
It will prevent the beanballs spills out while removing from the cover. Now you create a pathway to release bean balls into the garbage bag.
Step 3: Hold the bean bag’s the bottom side upward and shake it.
As a final step, you should hold the underside of the bean bag lining upward. Then automatically, the garbage bag directs into the ground side. It will inspire beanballs to transfer into garbage bags speedily.
This method isn’t practiced in bean bags filled with heavy fillers such as sand and rice. Because of heavyweight, the safety pin joint can damage, and it will cause to spill out the stuffing. Thus if you want to remove heavyweight fillers, try method 3.
Method 2 – With Both PVC Tube and Garbage Bag
This process is very secure. Because it will prevent or minimize the risk of beanballs spill outs. Moreover, you have to spend 5-10 minutes on this method.
However, there are some tools that you need to do this. Do not worry, you can find them from your home.
Required materials:
- A PVC tube approximately 8 to 10″ long and 3″ to 4″ in diameter / Strong plastic empty bottle
- Garbage bag or big pillowcase
Step 1: Insert PVC pipe into the garbage bag and seal it using ducktape
The garbage bag size should be enough to remove all beanballs. Therefore take a garbage bag that is larger than the bean bag.
Then insert PVC pipe into it and apply ducktape around the joint well. It may prevent beans beads spill-outs. Make sure to insert at least 1.5 inches into the garbage bag.
Step 2: Open the bean bag, then squeeze some baby powder into the beans
The baby powder helps to reduce the static charge of EPS balls.
Step 3: Insert the PVC pipe into the bean bag and seal it using ducktape
PVC pipe provides a pathway to transfer beanballs from bean bags to garbage bags. Thus, open the inner zip and insert 1-1.5 inches into the bean bag. Then you can seal the joints using duct tape.
Rather than a PVC tube, you can do the same task using a water bottle. The only thing is you should cut the bottom and upper side of the bottle.
However, if you cannot find both of the above materials, roll up the squire shape cardboard to create a cylindrical tube. Moreover, use ducktape or strong glue to create a cardboard tube.
The only thing you should keep in mind is pasting joints carefully to prevent undesirable accidents.
Step 4: Hold bean bag bottom into upwards and shake it
In this step, you should gently shake the bean bag. It will facilitate to transfer of beans quickly to the garbage bag. Be mindful not to shake the bean bags speedily.
Thus it can damage the joints that adhere with ducktape. If it damages, the EPS balls may overflow and messed up your whole room.
Step 5: Tie up the garbage bag
It is essential to remove the PVC pipe and attached duck tape safely from the garbage bag. Do not let the tear up garbage bag while you are take out ducktape or PVC pipe.
Finally, you can tie up garbage bags properly and use suitable methods to dispose of them. However, it is better to put filled garbage bags on another bag to prevent the risk of tear up.
Method 3 – With a Basket
Do you fill your bean bag with heavy fillers like rice, pebbles, and sand? Then you can try this method.
Required materials:
- Plastic or aluminum basket or cup
- Two garbage bags or a big cloth bag
Generally, if your bean bag is filled with heavy fillers, you should take some strong garbage bags or other alternatives like cloth bags. Thus, a typical garbage bag cannot tolerate a vast weight.
Step 1: Open the zipper of the bean bag lining
Step 2: Use a plastic or aluminum cup to remove bean bag fillers
Generally, these fillers do not have a static charge. Because of that, you can use a plastic cup to remove them into a garbage bag.
Step 3: Bang the lining cover and remove residuals
Some filler particles can be attached to the bean bag and remain further. Thus, you should bang them well and remove residuals.
You just have to spend 5 to 10 minutes on this process. According to the cup size, the filler beads removal time may vary. Therefore, make sure to take a bit large cup that has enough strength to remove heavy fillers.
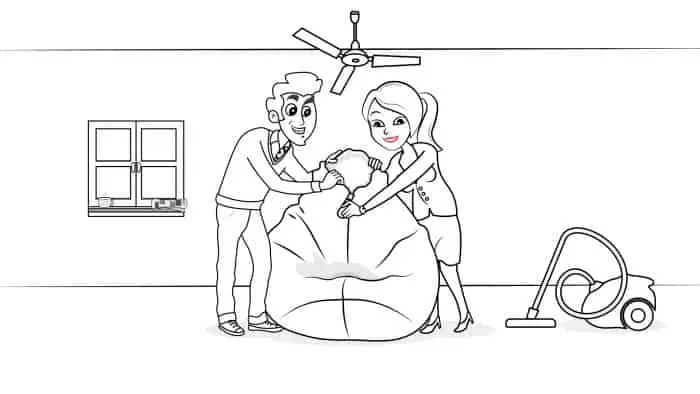
Method 4 – With a Supporter
You’ll want another person to do this job as this can be a little tricky to do alone. And keep your kids and pets away. Because if some incident occurs, they may pick up and ingest the beans.
Moreover, this method is ideal for removing bean bag fillers such as;
- EPS beads
- EPP beads
- Micro-beads
- Compressed foam
- Hay
The best thing is you do not need to worry about special tools. You just want few resources to do this task. Moreover, it will take just a few minutes.
Required materials:
- Plastic bag
Step 1: Switch off fans and air conditioning units
You should do this process in a calm environment that does not have strong airflow because strong airflow can roll away light-weighted beans.
Step 2: Open the garbage bag mouth
In this step, you should ask for support from your friend. Then you can do the below step.
Step 3: Open the bean bag cover and remove it
Step 4: Open the lining cover 2, 3 inches and fix the zip using a safety pin
In this step, you should fix the lining cover mouth size. So, you can use safety pins to lock and prevent further opening. Because if it open unexpectedly, there is a high risk of beans spill out.
Step 5: Keep lining opening inside of the garbage bag and let transfer beanballs
In this step, you have to hold the bottom side of the bean bag with one hand and keep another hand on the zipper opening. Then, you can regulate the beans’ transfer rate by changing the lining cover opening size.
However, keep the bean bag opening at least 6 inches inside of the garbage bag to reduce the impact of static charge. Furthermore, always keep in mind to select garbage bags that may be enough to remove beanballs.
Step 6: Done, tie the garbage bag
This is a crucial step. Sometimes you may pay your full attention to removing bean bags fillers only. But do not forget about the garbage bag that used to store thousand of beanballs.
You should tie the garbage bag opening properly. And also, if you feel one garbage bag does not have enough strength to keep bean beads, put it into another garbage bag. Because bean bags can tear up easily, your whole room will be messed up if that kind of circumstance occurs.
Special Note
- You can spray water or baby powder into the bean bag to reduce static charges.
- If some beans are spilled out during these methods, use a vacuum cleaner to collect them.
- As a decent human being, properly dispose of removed beanballs.
- Keep your kid and pets away when you are removing bean beads from bean bags.
- Always store garbage bags filled with thousands of beanballs safely to prevent undesirable accidents.
Final words
Removing your old bean bag fillers does not have to be time-consuming or messy. If you follow the above guidelines, it will take just a few minutes, and there should be little to no mess.
Ultimately, the circumstances behind removing bean bag fillers is a great deal and joyful thing. So, do not hesitate to remove your old stuff and refill it with new beanballs to experience great relaxation.