How to Make a Bean Bag Chair Out of Old Clothes?
The whole furniture world dramatically changes with the innovation of bean bags. Since 1970, beans have gone through a long journey, and it has been developing with new technologies.
Everyone loves to sit comfortably. Hence, the bean bags get top ranking on the most comfortable furniture list. That’s why bean bags have this huge demand worldwide.
However, the bean bag is a simple piece of furniture that you can make in the home. But the major issue is you worrying about raw materials. Why don’t you think about alternatives? Look at your surroundings.
How many old clothes take permanent spaces in your cupboard? Do you like to give rebirth to them? So, let’s check how to make a bean bag chair out of old clothes.
Table of Contents
Make a Bean bag Using Old Clothes
Required Materials –
- Old cloths
- Zipper
- Sewing machine and threads
- Cardboard
- Pen or pencil
- Scissor
- Measuring tape
- Pins
- Bean bag filler beads
Step 1: Take Your Old Clothes
As an initial step, take your old clothes. I know you may have plenty of old clothes. Thus, you may think, what are the best old clothes that I can use for my bean bag? Please check the below list.
- T-shirts
- Blouses
- Frocks
- Bedsheets
- Table cloths
- Denim trousers
- Old Blankets and curtains
When you are selecting materials for the bean bag, check the below factors.
- The softness of the fabric
- Appearance and color
- Strength
- Size of the fabric
Among the above list, the most critical factor is the strength of the fabric. Because of some old clothes are in decaying state. So, those are not good for bean bag preparation.
Step 2: Prepare Old Clothes to Make a Bean Bag
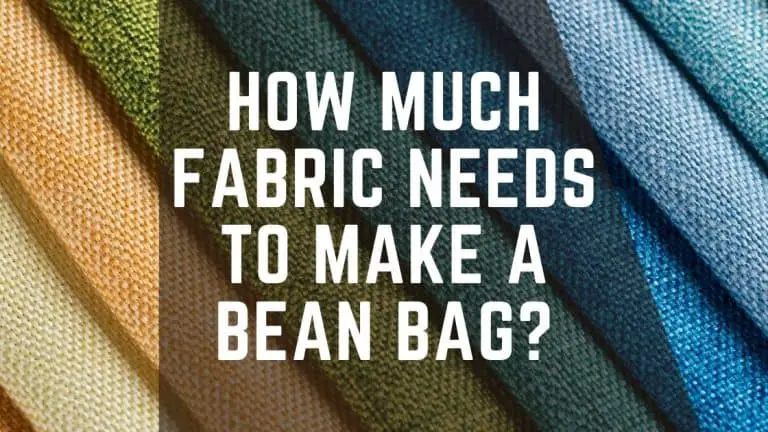
Generally, to make a toddler’s bean bag, you need around 3 yards of fabrics. Also, to make an adult bean bag, you need approximately 6 yards of fabric.
But here, you have an advantage. You do not need this complete length from one cloth, and you can take this 3 or 6 yards from different old clothes according to your preference.
So, after you select old clothes, prepare them with the below guidelines.
- Remove buttons and pegs
- Cut excess threads coming from fabrics
- Remove stiff collars and boarders
- Get rid of patches from main fabric pieces
Now you have clean materials.
Step 3: Create Block Designs
You can create any bean bag shape including, cylindrical shape, tear-drop shape, sofa, or ball shape.
But in this case, you may not have enough fabrics from the same material. Thus, you can use several old clothes to overcome this issue. Here, I suggest creating ball shape bean bag using old clothes.
Further, if you want to know how to create fabric blocks, follow these phases.
Phase 1: First, think about the bean bag circumference size and number of fabric pieces.
You can use any circumference measurement for your bean bag.
Phase 2: According to it, create a sphere shape cardboard block as a stencil.
Here I explain how to make a bean bag ball that has 7 feet in circumference. Also, I used seven different fabric pieces for that.
To take sphere shape design width = Circumference of bean bag / Number of fabric pieces
= 7 feet / 7 = 1 feet
To take sphere shape design Length = Circumference of bean bag / 2
= 7 feet / 2 = 3.5 feet
Now you may get the length, width measurements for your customized bean bag. Here I take width as 1 feet and length as 3.5 feet. Then draw a rectangle using these measurements.
Phase 3: Then mark the middle point of this rectangular and draw a sphere shape design on it.
Phase 4: Cut this sphere shape cardboard.
Now you have a block design and use it as a stencil to cut fabric pieces.
Step 4: Draw a sphere shape design on seven different fabrics.
Using your cardboard stencil, draw the sphere shape design on selected old clothes.
If you want to clarify how to draw a sphere shape design, check the below video. It includes how to take measurements for small cloth balls. But that theory is the same for bean bags too. The only difference is you should magnify these measurements according to your bean bag circumference.
Step 5: Cut the fabrics
When cutting the sphere shape block, allow 1, 2 inches from drawn lines because it is helpful for sewing purposes. Congratulations, now you finished 80% of your bean bag.
Step 6: Add zipper between two sphere shape fabrics
You can prepare a bean bag without adding a zipper. But my recommendation is, having a zipper is useful when cleaning the bean bag cover. Anyhow, remove the zipper flap to enhance the safety of the bean bag. Then your kids can’t open the bean bag easily.
Step 7: Sew the sphere shape fabrics together
Use drawn lines for sewing. One by one, join all fabrics together. If you do not add a zipper for a bean bag ball, allow 1 feet hole to add bean bag fillers. But if you have already sewed the zipper, do not worry; sew all edges together.
Step 8: Add bean bag fillers
You can add bean fillers in two ways. The first one is directly filling beans into a bean bag. The second one is to add bean beads into the inner bag first and then insert it into the bean bag.
However, if you are going to use EPS beads, it is better to use an inner bag or lining bag. Because it has a static charge and, under any accidents, it can spill out and create a mess.
Select bean bag filler from the below list
- Expanded polystyrene balls
- Shredded memory foams
- Packing peanuts
- Cotton
- Rice
- Pebbles
- Old clothes
Are you surprised? Yes, you can use your old clothes as bean bag fillers too. So, if you do not have any other special things besides old clothes, you can carry on the bean bag preparation process.
So, let’s check how to prepare bean bag fillers using old clothes.
Bean Bag Fillers from Old Clothes
Phase 1: Take old cloths
You do not need to think about old clothes’ color, patterns, or outer appearance here. So, you can use shaded, torn-up fabrics for this.
The only thing you should consider is the level of softness and decaying state.
Moreover, the soft cloths can give a more comfy and fluffy feel to your bean bag. Also, do not use decaying fabrics to fill bean bags.
Phase 2: Remove hooks, buttons, hard edges from cloths
Phase 3: Cut old clothes into small pieces
Here you can cut them according to your preference. But keep in mind, small fabric pieces are easy to adjust with your body. It will give more comfort than large fabric pieces. So, cut them as much as smaller.
You can read our complete guide on using old clothes to fill bean bags here.
Step 9: Close the bean bag.
If you have a zipper in the bean bag, enclose it. Or else, if you leave some space to add bean fillers, then sew that hole manually.
Step 10: Done
Now you have an elegant look bean bag. Especially toddlers love to sit on a bean bag with this fancy look.
Suppose one fabric is not enough to cut a required shape. Then join 2, 3 fabric pieces together, then cut the required shape.
There is not any exact process to create a bean bag. So, you can customize your bean bag with existing accessories and materials.
Final Words
Spending dollars is not the only way to obtain things that you want. If you cannot afford the price of a bean bag, do not lose hope. You can create it!
This will take only a few hours. Use your leisure time for it. Old clothes are a headache for us. But if you use it properly, you can give rebirth to them with a well-looking bean bag. After preparing a bean bag with old clothes, indeed, your kids will say you are a superhero!